
Fragment
Fragment는 FragmentActivity 내의 어떤 동작 또는 사용자 인터페이스의 일부를 나타냅니다. 쉽게 말하면 화면 분할을 가능하게 해주는 것이라고 할 수 있습니다. 여러 개의 프래그먼트를 하나의 액티비티에 결합하여 창이 여러 개인 UI를 빌드할 수 있으며, 하나의 프래그먼트를 여러 액티비티에서 재사용할 수 있습니다. 자체적인 수명 주기를 가지고, 자체 입력 이벤트를 수신하고, 액티비티 실행 중에 추가 및 삭제가 가능합니다. 프래그먼트는 항상 액티비티 내에서 호스팅 되어야 하며 해당 프래그먼트의 수명 주기는 호스트 액티비티의 수명 주기에 직접적으로 영향을 받습니다.
프래그먼트를 액티비티 레이아웃에 추가하면, 해당 프래그먼트는 액티비티의 뷰 계층 내에서 ViewGroup에 들어가고 자체적인 뷰 레이아웃을 정의합니다. 액티비티의 레이아웃 파일에서 <Fragment> 요소로 프래그먼트를 선언하거나 기존 ViewGroup에 추가하는 방법으로 애플리케이션 코드에서 프래그먼트를 선언하면 액티비티 레이아웃에 프래그먼트를 삽입할 수 있습니다.
Fragment Lifecycle
Fragment를 생성하려면 Fragment의 하위 클래스를 생성해야 합니다. 아래 그림은 Fragment Lifecycle입니다.
Fragment가 Activity안에 존재하기 때문에 Activity의 영향을 받습니다.
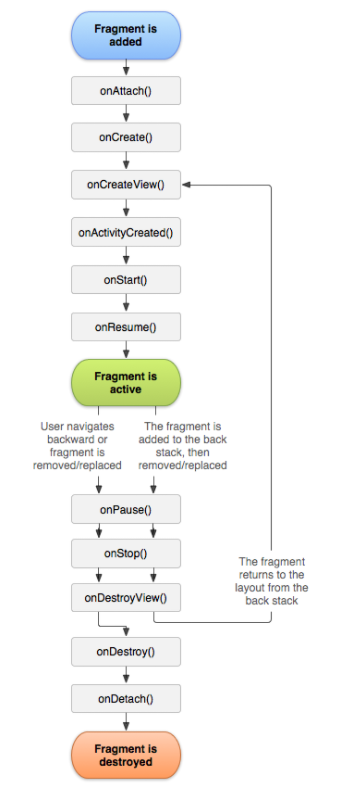
onAttach()
: Fragment가 Activity에 붙을 때 호출된다.
onCreate()
: Activity에서의 onCreate()와 비슷하나, UI 관련 작업은 X
onCreateView()
: Layout 을 inflater 하여 View작업을 하는 곳이다.
onActivityCreated()
: Activity에서 Fragment를 모두 생성한 후 호출된다.
onStart()
: Fragment가 화면에 표시될 때 호출된다. 사용자의 Action과 상호 작용을 할 수 없다.
onResume()
: Fragment가 화면에 완전히 표시되었으며, 사용자의 Action과 상호 작용을 할 수 있다.
onPause()
: Fragment가 사용자의 Action과 상호 작용을 중지한다.
onStop()
: Fragment가 화면에서 더 이상 보이지 않게 되며, Fragment기능이 중지된다.
onDestroyView()
: View 리소스를 해제할 수 있도록 호출된다. backstack을 사용했다면 Fragment로 다시 돌아갈 때 onCreateView()가 호출된다.
onDestroy()
: Fragment상태를 완전히 종료할 수 있도록 호출한다.
onDettach()
: Fragment가 Activity로부터 해제될 때 호출된다.
간단한 Fragment 사용
MainActivity
|
1
2
3
4
5
6
7
8
9
10
11
12
13
14
15
16
17
18
19
20
21
22
23
24
25
26
27
28
29
30
31
32
33
34
35
36
37
38
39
40
41
42
43
44
|
package com.example.fragement;
import androidx.appcompat.app.AppCompatActivity;
import androidx.fragment.app.FragmentTransaction;
import android.os.Bundle;
import android.view.View;
import android.widget.Button;
public class MainActivity extends AppCompatActivity {
Button btn_menu1, btn_menu2;
@Override
protected void onCreate(Bundle savedInstanceState) {
super.onCreate(savedInstanceState);
setContentView(R.layout.activity_main);
btn_menu1 = findViewById(R.id.btn_menu1);
btn_menu2 = findViewById(R.id.btn_menu2);
btn_menu1.setOnClickListener(new View.OnClickListener() {
@Override
public void onClick(View view) {
FragmentTransaction transaction = getSupportFragmentManager().beginTransaction();
Fragment1 fragment1 = new Fragment1();
transaction.replace(R.id.frame,fragment1);
transaction.addToBackStack(null);
transaction.commit();
}
});
btn_menu2.setOnClickListener(new View.OnClickListener() {
@Override
public void onClick(View view) {
FragmentTransaction transaction = getSupportFragmentManager().beginTransaction();
Fragment2 fragment2 = new Fragment2();
transaction.replace(R.id.frame,fragment2);
transaction.addToBackStack(null);
transaction.commit();
}
});
}
}
|
cs |
Fragment1과 Fragment2는 같은 소스코드이며 ,Fragment1을 Fragment2로 바꿔주면 됩니다.
|
1
2
3
4
5
6
7
8
9
10
11
12
13
14
15
16
17
|
package com.example.fragement;
import androidx.fragment.app.Fragment;
import android.os.Bundle;
import android.view.LayoutInflater;
import android.view.View;
import android.view.ViewGroup;
public class Fragment1 extends Fragment {
@Override
public View onCreateView(LayoutInflater inflater, ViewGroup container, Bundle saveInstanceState){
return inflater.inflate(R.layout.activity_fragment1,container,false);
}
}
|
cs |
main.xml
|
1
2
3
4
5
6
7
8
9
10
11
12
13
14
15
16
17
18
19
20
21
22
23
24
25
26
27
28
29
30
31
32
33
34
35
|
<?xml version="1.0" encoding="utf-8"?>
<RelativeLayout xmlns:android="http://schemas.android.com/apk/res/android"
xmlns:app="http://schemas.android.com/apk/res-auto"
xmlns:tools="http://schemas.android.com/tools"
android:layout_width="match_parent"
android:layout_height="match_parent"
tools:context=".MainActivity">
<FrameLayout
android:id="@+id/frame"
android:layout_width="match_parent"
android:layout_height="match_parent"/>
<LinearLayout
android:layout_width="match_parent"
android:layout_height="70sp"
android:layout_alignParentBottom="true">
<Button
android:layout_width="wrap_content"
android:layout_height="wrap_content"
android:layout_weight="1"
android:text="Fragment1"
android:id="@+id/btn_menu1" />
<Button
android:id="@+id/btn_menu2"
android:layout_width="wrap_content"
android:layout_height="wrap_content"
android:layout_weight="1"
android:text="Fragment2" />
</LinearLayout>
</RelativeLayout>
|
cs |
fragment1.xml과 fragment2.xml은 text로 표시만 해주었습니다.
|
1
2
3
4
5
6
7
8
9
10
11
12
13
14
15
|
<?xml version="1.0" encoding="utf-8"?>
<FrameLayout xmlns:android="http://schemas.android.com/apk/res/android"
xmlns:app="http://schemas.android.com/apk/res-auto"
xmlns:tools="http://schemas.android.com/tools"
android:layout_width="match_parent"
android:layout_height="match_parent"
tools:context=".Fragment1">
<TextView
android:layout_width="wrap_content"
android:layout_height="wrap_content"
android:textSize="50sp"
android:text="Fragment1"/>
</FrameLayout>
|
cs |
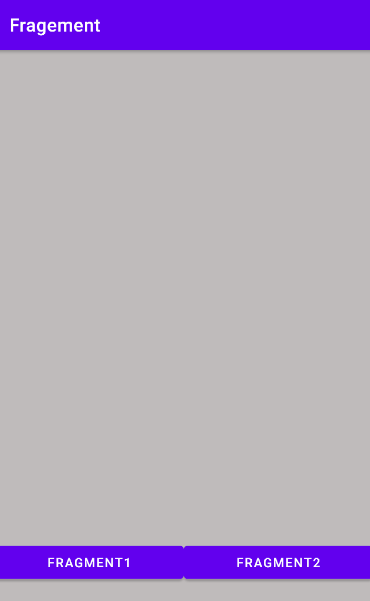
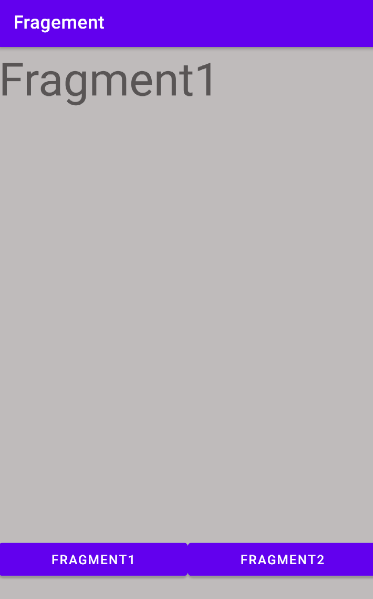
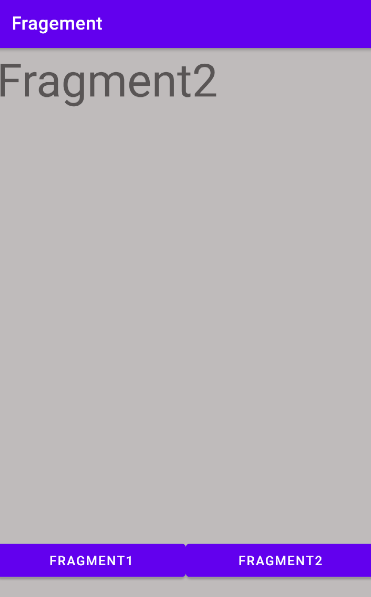
실행화면
참고 문서
- developer.android.com/guide/components/fragments?hl=ko
'안드로이드' 카테고리의 다른 글
| [안드로이드] ANR(Application Not Responding) (0) | 2021.01.19 |
|---|---|
| [안드로이드] Glide 라이브러리 (0) | 2021.01.18 |
| [안드로이드] Service (0) | 2021.01.14 |
| [안드로이드] Activity Lifecycle(활동 수명 주기) (0) | 2021.01.06 |
| [안드로이드] Android Jetpack (0) | 2020.12.31 |